Types of Bike Brakes: Rim, Disc, and Hub Explained
Types of bike brakes differ in wet-weather stopping and upkeep. Compare rim, disc, and hub systems to choose the right setup for how you ride.

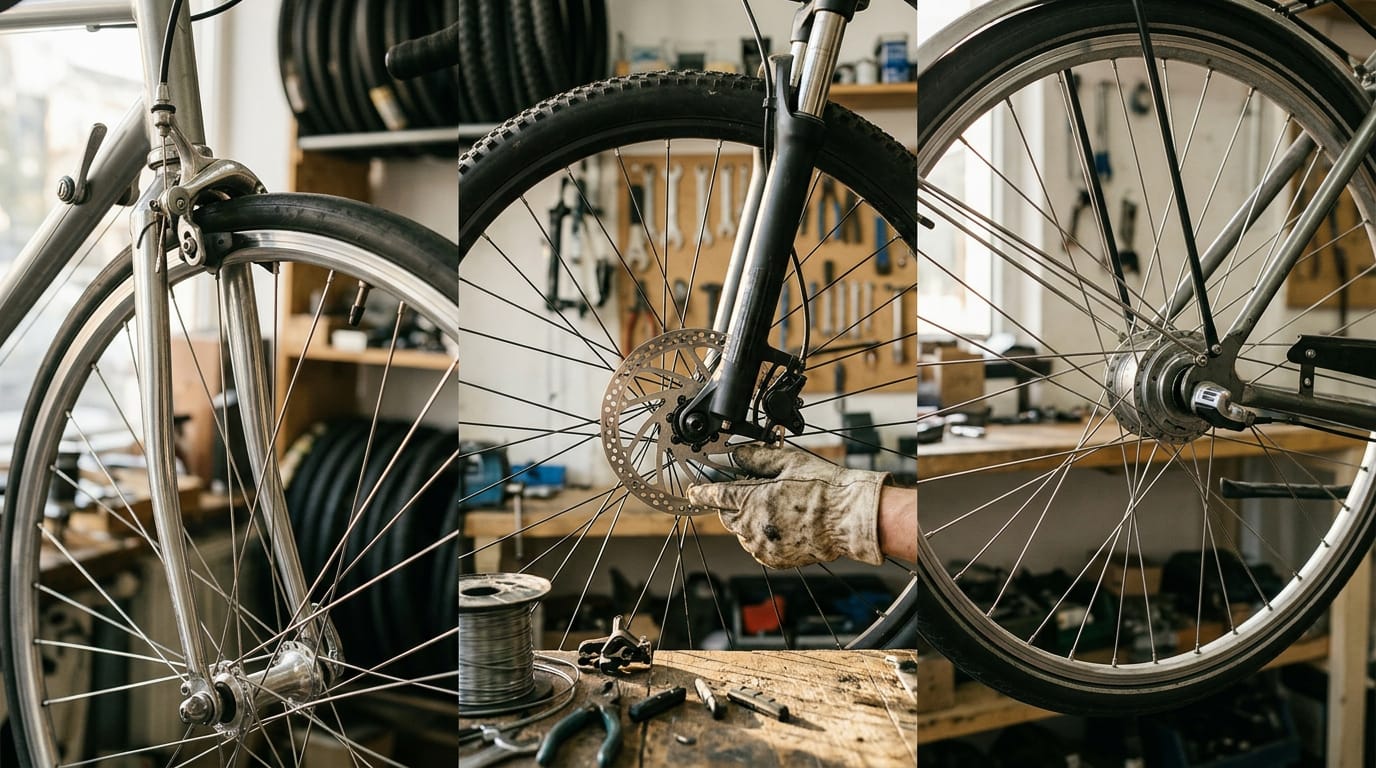
Think about the last time you squeezed the brakes on a wet hill and felt the bike slow right when you needed it. Bike brakes all do the same basic job, but they get there in very different ways, and that’s where things get confusing fast.
In this guide, we’ll walk through rim brakes, disc brakes, and hub brakes, the three main types you’ll see on bikes today. We’ll compare how each one works, what it asks of you in upkeep, and where it shines, so you can match a brake to how you ride.
Types of Bike Brakes and Core Parts
Rim, disc, and hub brakes look different, but they all stop a wheel the same basic way.
How braking slows the wheel
Every brake works through friction, the rubbing contact that slows the wheel’s rotation. Pull the lever and the pads press the rim or rotor, turning the wheel’s kinetic energy, its energy of motion, into heat.
The force at the pads is proportional to how hard you squeeze, so more pressure means a harder bite. Your hand sets the pace.
The parts that make up a brake
A brake is four parts working as one:
- Brake pads are the friction points that touch the rim or rotor, and they wear down, so check them often.
- Cables transmit hand tension. Squeezing the lever pulls the cable, which draws the pads inward.
- Levers trigger the system, turning your hand’s squeeze into force sent down the line.
- Calipers hold the pads and clamp them onto the rim or rotor. Cable brakes pull that clamp into place, while hydraulic systems push fluid through a sealed line.
Picking between flat and drop levers
Your handlebar sets the lever shape, so it’s the first thing to check:
- Flat bar levers pair with the flat handlebars common on mountain bikes, sitting right beside the grips.
- Drop bar levers sit on the curved bars of road bikes, so you can brake from the top or the lower curve.
Consider a weekend mountain biker on a rocky descent with both hands on the grips. Flat bar levers stay within easy reach, so one quick squeeze slows the bike and your hands never leave the grips.
Match the lever to your bar.
Brakes That Grip the Wheel Rim
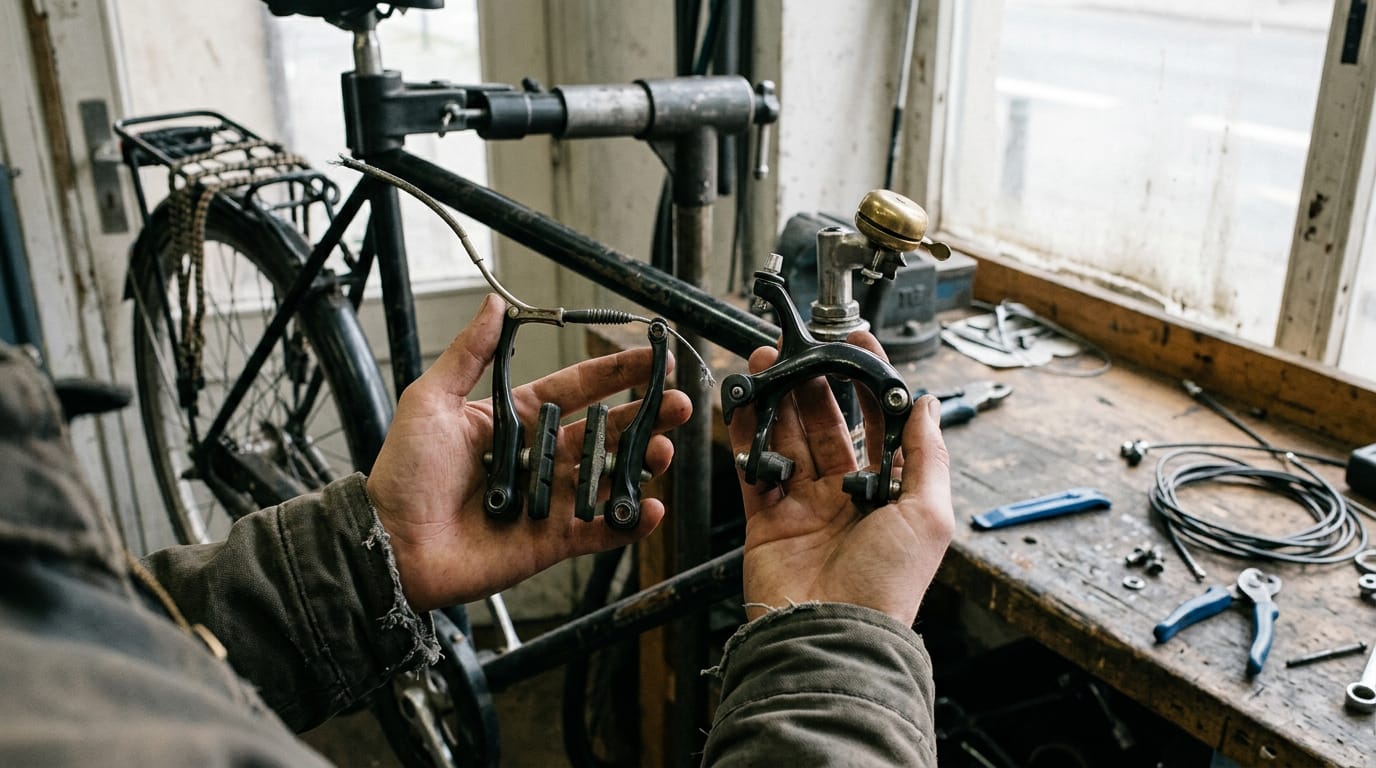
Rim brakes squeeze the edge of the wheel to slow you down, and they come in several designs worth telling apart. Old-style bike brakes are usually called spoon brakes or rod brakes, so you’ll know what you’re looking at on an older frame.
Lightweight caliper brakes for everyday bikes
Caliper brakes are the light option, and you’ll see two main layouts: side-pull and center-pull. Both suit sports bikes and regular bikes because they keep weight down. For road racing, look for dual-pivot brakes, a caliper style built for that job.
Consider a club rider who wants one bike for Saturday group rides and weekday errands. Light calipers keep the bike easy to lift onto a car rack, so the day starts with the riding instead of the heavy lifting.
Cantilever brakes for mud and touring
Cantilever brakes use separate arms, one mounted on the frame and one on the fork. That layout gives you clearance for mud and wide tires, so you’ll often see them on touring and off-road bikes.
Think of a rider on a week-long tour with wide tires and a loaded rear rack, heading down a muddy gravel road to camp. Cantilevers leave room for those tires and that mud, so the rider isn’t fighting the brakes on the way in.
Budget V-brakes and U-brakes for city bikes
V-brakes use a long-arm, single-cable design that you’ll spot on plenty of budget bikes. They also show up on hybrid and cyclocross bikes (built for off-road racing). Low cost makes them a common pick for city bikes, where budgets tend to be tight.
U-brakes use their own cable mechanism, so check which type your bike has before you shop for replacement parts.
The upsides and downsides of rim brakes
Rim brakes are a real trade-off: you get light weight and a low price, but you give up some power when conditions get tough. Rain and mud are the test. Here’s how it breaks down:
- Light, cheap, and easy to maintain. These are the upsides, and they’re real.
- Weaker when wet or muddy. Stopping power drops when the roads turn slick.
- Causes rim wear. Braking wears the rim itself, so check it during routine tune-ups.
- Less powerful than discs. That’s the price of staying light and cheap, and it’s worth weighing against where you ride.
Disc Brakes That Grab a Rotor
Disc brakes stop you on a separate metal surface instead of the rim, and that one change shapes how they feel, what they cost and what your bike needs to run them. Here’s how each style works and what it takes to add one.
How the rotor and caliper stop you
The rotor is a metal disc attached to the hub at the center of the wheel. The caliper is the clamp on the frame or fork, and when you pull the lever, it squeezes brake pads against the rotor.
Because the braking surface sits apart from the rim, the rim doesn’t take the wear of stopping.
Think of a weekend rider coming down a steep fire road with a loaded pack. Every bit of stopping happens at the rotor, so the rim takes less of the beating on every switchback.
Cable-pulled discs that are simpler and cheaper
Cable-actuated discs run a cable from the lever to the caliper. The setup is simple, which keeps the cost down, but you’ll need more hand force for the same stopping power.
A stretched or frayed cable also makes the lever feel mushy, so the same squeeze can stop you differently from one ride to the next. For a commuter on short, flat routes, that trade is often worth it.
Hydraulic discs for smooth, strong stopping
Hydraulic discs swap the cable for hydraulic fluid sealed in a line from lever to caliper. Instead of pulling a cable, you’re pushing fluid, which takes minimal hand effort.
You also get smoother, stronger stopping and better modulation, meaning finer control over how much braking you apply. That’s why hydraulics suit e-bikes and high-speed riding. If e-bikes are new to you, our e-bike definition covers motors and legal classes.
Weighing the benefits and drawbacks of discs
Discs are less about having the best brake and more about matching the brake to your ride. The big win is weather. According to BikeRadar’s guide to road disc brakes, disc brake power is less affected by wet weather than rim brakes.
Discs also mean less rim wear, since the pads work on the rotor. Think of a club cyclist riding wet winter mornings who needs stopping she can count on when the pavement turns slick. The trade is cost and weight.
Discs are more expensive and heavier, and they need a compatible frame and wheels. Compatibility comes first.
What it takes to add disc brakes
Adding discs isn’t always a simple swap. Often you’ll need a new frame and wheels, not just new brakes. Before you shop, check these three points:
- Frame and fork mounts. The caliper needs a dedicated spot to attach.
- Rotor size. Your frame and fork have to accept the rotor you’re buying.
- Axle standard. The wheel’s axle has to match what your frame and fork use.
Settle the mounts first. That order keeps you from paying for parts your bike can’t use.
Brakes Built Inside the Wheel Hub
Hub brakes keep their working parts inside the wheel, so weather and grit have less to get at. Here’s how three designs work and who they suit best.
Stopping with a backpedal coaster brake
A coaster brake works through the pedals. You stop by pedaling backward, and it acts on the rear wheel only, so there’s no lever to reach for on the handlebars.
Consider a parent buying a first bike for a six-year-old who’s still learning to balance. Pedaling backward is a motion the kid already knows, so there’s nothing new to learn about hand levers.
Because it’s weatherproof, a rainy afternoon in the driveway won’t get in its way.
It’s simple, low maintenance, and a strong fit for cruisers and kids’ bikes. Its braking power is limited, so it’s best for relaxed riding. Simple, yes. Powerful, not so much.

Drum brakes that expand inside the hub
A drum brake uses brake shoes that expand inside the hub and press against the drum to slow the wheel. Because those parts sit inside the hub, they’re weatherproof and need little upkeep.
Think of a commuter riding the same route to work five days a week. A drum brake handles that daily wear without much fuss, so the extra weight is a fair trade for skipping weekend repairs.
The catch is weight and power. Drum brakes are heavy and give less stopping power, but they’re durable for everyday riding.
Shimano’s internal roller brake design
Shimano’s internal roller brake keeps its whole mechanism inside the hub. Grime and water stay away from the working parts, so it’s weatherproof and runs clean.
Its trade-off is complexity. It’s heavy and more complex than a coaster brake, so it suits riders who are comfortable with a bit more hardware under the bike.
Which Bicycle Brakes Are Better for You?
Quick verdict: for most riders, hydraulic disc brakes are the better pick, since they stop most consistently in rain and at speed.
Rim brakes suit light road bikes and tight budgets, while hub brakes suit riders who want their hardware sealed from the elements.
Match brakes to terrain and riding style
Each riding style asks different things of a brake:
- Mountain biking favors discs, which give dependable stopping power on rough trails.
- Road racing favors light calipers, since every gram counts at speed.
- Commuting rewards simple, cheap setups you can keep running easily.
Long rides demand more predictable braking than short ones. Match the brake to how you ride, not how you wish you rode. Picture a weekend rider who commutes on city streets and hits gravel trails on Sunday.
Hydraulic discs give her one reliable stop on both, so she doesn’t need two setups.
Here’s how the three types stack up:
| Brake type | Wet weather | Best for |
|---|---|---|
| Rim brakes | Weak when wet | Road racing with light calipers |
| Disc brakes | Hydraulic versions are best in rain | Mountain biking, e-bikes and high speeds |
| Hub brakes | Sealed from the elements | Riders who want less exposure to rain and grit |
How wet weather changes your choice
Here’s how each type handles rain:
- Rim brakes lose bite when wet, so you’ll brake earlier and leave more room.
- Hydraulic discs are the strongest performers in rain.
- Hub brakes are sealed from the elements, keeping rain and grit away from the braking hardware.
Wet weather exposes weak brakes.
What shapes how well brakes perform
- Durability: brake pads wear down, and heat fade, when a brake loses bite after prolonged use because it overheats, can catch riders off guard.
- Modulation: how smoothly a brake responds to your lever. Good modulation makes one-finger braking possible, so your other hand stays on the bars.
- Cost and weight trade-offs: lighter setups usually cost more, so you’re paying for every gram you save.
- Long-term value: look past the sticker price. A cheap brake that wears out fast can cost more over time.
Brakes for e-bikes and high speeds
- Hydraulic discs suit e-bikes, since the extra weight and speed call for strong, consistent stopping power.
- Stable braking at high speed: the bike stays controlled when you slow down from a fast pace.
- Brake lights on e-bikes: worth a look if you ride in traffic, so drivers and riders behind you can see you slowing.
Brake options for a tighter budget
- Cheap options for commuting cover the basics, so you can start riding without a big spend.
- Rim brakes are cost-effective, which makes them the easiest starting point.
- Hydraulics cost more up front, so they’re worth it if you ride in rain, on an e-bike or at speed.
Pick the brake your riding needs, not the most expensive one on the shelf.
Keep Your Brakes Safe with Regular Checks
Brakes wear gradually, so we recommend a quick routine check to catch problems early.
When to check and replace brake pads
According to Gear & Grade, Park Tool’s threshold is at least 1 mm of pad material, so replace pads once they drop below it.
Rim pads have wear grooves; once they’re gone, it’s time for new pads.
Mud accelerates wear. Consider a weekend rider who checks her pads after a muddy Saturday trail and finds them near the 1 mm line. A fresh set before Sunday’s ride keeps her stopping power.
Unsure how much pad is left? See a bike shop.
Match pads to your brake: rim pads for rim brakes, disc pads for disc brakes. Pads also come in metallic or resin compounds, so check the label.
New pads need bedding-in before they grip well. The 30/30/30 rule is the bedding-in routine for brakes, so follow your pad maker’s instructions for the exact steps.
Checking cables and levers for wear
Cables and levers show wear before the brakes do. Look for:
- Slack or rusted cables. Loose or rusty cables can’t pull the pads in cleanly.
- Excess free play. A lever that travels far before the brake bites has too much slack.
- Squeeze response. With the bike stopped, squeeze the lever. It should bite firmly, not sink toward the bar.
- Listen for squeaking. A squeak is easy to ignore. Don’t.
Catch these signs early, not on a steep descent.
Bleeding hydraulic brakes needs special tools
Hydraulic brakes run on fluid, so when air gets into the lines, they need bleeding to purge it. Bleeding needs specialised tools, so if you don’t have the kit, a bike shop can handle it.
Safety Standards and Future Brake Tech
Brakes have to meet rules before they reach you, and the technology keeps changing.
Rules and certifications brakes must meet
Start with the rules from the International Organization for Standardization (ISO). The DIN EN ISO 4210-4:2021-12 standard, available in German and English, sets test procedures for bicycle brakes, so testing follows one shared method.
Indonesia adds its own national certification, SNI (Standar Nasional Indonesia). Say you’re a parent buying a first commuter bike for a teen who rides to school. Certification gives you a baseline, so you’re not judging by the price tag or the paint job.
Certification shows whether a brake passed a defined test, not how it will feel on a wet hill.
Road safety data, meaning real-world crash and failure reports, rounds out the picture. We don’t have specific figures here, so treat certification as a floor, not a guarantee.
Where brake technology is headed
Four ideas to watch, though none should drive today’s purchase:
- Regenerative braking: On an e-bike, the motor can slow you down while feeding some energy back into the battery.
- Smart adaptive brakes: Sensors adjust braking force as conditions change.
- Ceramic and titanium rotors: Alternative rotor materials being explored for weight and heat.
- Bio-composite pads: Pads made partly from natural materials.
How brakes are made and their impact
- Computer numerical control (CNC): Machines cut parts from solid material using computer-guided tools.
- 3D printing: Also known as additive manufacturing, it builds parts layer by layer.
Recyclability depends on what a brake is made of, so ask your shop what happens to worn parts.
Social and economic impact matters too. Where a brake is built can affect who makes it and who repairs it.
Rim, disc, and hub brakes each stop you in their own way, and none of them is the right answer for every rider. The best choice depends on how and where you ride, along with the frame and wheels you already own.
Good brakes disappear under you until the moment you need them. Pick the type that fits your riding, keep it checked, and you’ll ride with confidence every time.
References
- Bike Brake Pads: When to Replace Them and Which to Buy — gearandgrade.com (2026)
- Road bike disc brakes: pros & cons, compatibility, disc vs rim brakes — bikeradar.com (2025)
- DIN EN ISO 4210-4:2021-12, Fahrräder_- Sicherheitstechnische Anforderungen an Fahrräder_- Teil_4: Prüfverfahren für Bremsen (ISO/DIS_4210-4:2021); Deutsche und Englische Fassung prEN_ISO_4210-4:2021 — doi.org (2021)
Questions
What is the 30/30/30 rule for brakes?
The 30/30/30 rule is a brake-pad bedding-in routine used to help new pads develop reliable grip. The exact steps can vary, so follow the instructions from the pad or brake manufacturer.
What are old style bike brakes called?
Old-style bicycle brakes are usually called spoon brakes or rod brakes. They are distinct from modern rim, disc, and hub brake designs.
Which bicycle brakes are better?
Hydraulic disc brakes are generally the best choice for consistent stopping, especially in wet weather, at speed, or on e-bikes. Rim brakes are lighter and less expensive, while hub brakes suit riders who want weather-sealed, low-maintenance hardware.
Sources
- DIN EN ISO 4210-4:2021-12, Fahrräder_- Sicherheitstechnische Anforderungen an Fahrräder_- Teil_4: Prüfverfahren für Bremsen (ISO/DIS_4210-4:2021); Deutsche und, doi.org,
- Bike Brake Pads: When to Replace Them and Which to Buy | Gear & Grade, gearandgrade.com,
- Road bike disc brakes: pros & cons, compatibility, disc vs rim brakes, bikeradar.com,
Find your level
The Counter